| Author | Message | ||
| Verell Boaen (Verell)
Intermediate Member Username: Verell Post Number: 1167 Registered: 5-2001 |
Lou, Would you PLEASE post that list of p/ns? I believe it would make a good reference. I'll be pulling my suspension apare in mid-winter & doing the same project you are. While I have the inner bushings & can figure out the sway bar ones. I haven't come across the KONI bushings & would greatly appreciate having the P/Ns. Also tell us what size your sway bars are as at least 3 or 4 different diameters are used between the various 308 flavors & vintages. | ||
| lou staller (Lou_staller)
Junior Member Username: Lou_staller Post Number: 66 Registered: 12-2002 |
Ok, here's what I found out concerning bushings. After numerous e-mails, off line with a bunch of F-chatters, I've come to the decision that I will go with the Polyurethane bushings. With B. Campen's help and a few phone calls to ES and Summit I now have a complete list of part numbers for the inner a-arm bushings, sway bar bushings and sway bar end bushings. They also have shock bushings but since I'm going to go with the aluminum shocks that Henry Chin used which come with the poly bushings I don't need to order any. As far as the rear outer bushings I'm going to order some factory stuff, ugh! My concern about the ride quality was answered by the ES guy I spoke to and many F-chatters. The bushings are going to prevent body roll and general slop in corners. The shocks and springs have the greatest impact to the 'ride' quality. Simple and makes sense. So off go the A-arms, uprights, swaybars and other stuff to the powder coater. Once I get them back I'll intall the bushings and start putting things together. Man is this fun! | ||
| Verell Boaen (Verell)
Intermediate Member Username: Verell Post Number: 1155 Registered: 5-2001 |
Lou, So far everyone who's installed the poly bushings has been very happy with them. Remember that the springs & shocks are the major components contributing to the car's ride. There are exact fit poly bushings made for the 16 3x8 inner bushings. We know that ES makes them & the correct ES part #. Since ES is on our Sh$@# list, try contacting the other poly bushing mfgs to see if any of them make 3x8 bushings. BTW, I'd like to find poly replacements for the 3x8 rear outer bushings if anyone comes across a source. | ||
| Jonathan (Birdman)
Junior Member Username: Birdman Post Number: 172 Registered: 6-2003 |
Hi Lou, Since all I did was the sway bar, I can't say what doing all the bushings in polyurethane would do to the ride of your car. For certain, if you use poly, you will have to do a certain degree of hand fitting on each part since they are not made to order for your car. The Ferrari factory ones ought to "drop in" with a lot less effort. On the other hand, they will not last as long and they will cost a lot more. For what it's worth, the poly bushings didn't make my car drive much differently from the stock bushings but it's just a sway bar, not the entire suspension. Jonathan | ||
| lou staller (Lou_staller)
Junior Member Username: Lou_staller Post Number: 63 Registered: 12-2002 |
Now you got me thinking again! I'm getting ready to order all the bushings for the front and rear suspension for my '84 308 and again am confused as to what to order! Polyurethane or rubber? I've been told, many times, that the poly will result in a very stiff ride compared to the factory rubber 'crap' And now the price difference. What should I do? | ||
| dave handa (Davehanda)
Intermediate Member Username: Davehanda Post Number: 1921 Registered: 5-2001 |
Nice job guys! Great post | ||
| Richard Ham (Hampappy)
New member Username: Hampappy Post Number: 30 Registered: 2-2003 |
Thanks for the post Johnathon. Great stuff, clear pictures, good description of each step. Now could you do all the other jobs on the car in the same way ?, ha ha Sure would help though ! Richard | ||
| Verell Boaen (Verell)
Intermediate Member Username: Verell Post Number: 1141 Registered: 5-2001 |
re:"an excuse to go over, eat pizza, hang out, play with tools and drive the Ferrari! Unfortunately, if Verell gets too many more friends like me, he may have to start scheduling people in blocks!" Huh!!! I'd consider that great fortune, especially if they bring the beer & Pizza(LOL)! BTW, that was just a plain old mechanicat 3-ton press. Plenty of power for just about any automotive job | ||
| Jonathan (Birdman)
Junior Member Username: Birdman Post Number: 167 Registered: 6-2003 |
Yes, the press was really handy (not to mention the lift) but the best thing about working with Verell is that he knows his stuff. I used to do a lot of work on motorcycles when I was younger, but I was never much of a car person. Sometimes working on the Ferrari can be intimidating because the cost of a goof can be so high, not to mention the parts. Verell has a lot of experience working on all kinds of cars and I feel better knowing that he will keep me from doing something stupid!! Besides, it's a lot more fun to work on a Ferrari with company, so it's an excuse to go over, eat pizza, hang out, play with tools and drive the Ferrari! Unfortunately, if Verell gets too many more friends like me, he may have to start scheduling people in blocks! Jonathan | ||
| Mitchell Le (Yelcab1)
Member Username: Yelcab1 Post Number: 679 Registered: 11-2001 |
$35 for ONE drop link bushing from Ferrari. Sure nice to have a friend with a Hydraulic press, a lathe, and greasy fingers. | ||
| Jonathan (Birdman)
Junior Member Username: Birdman Post Number: 164 Registered: 6-2003 |
Hi Ernie, I forget exactly what the Ferrari ones from Ferrari Uk were. They actually weren't that expensive, but you need to have them shipped from England and that alone costs more than $23.00. I like to save up a list and order from Ferrari UK all at once to save on shipping, but I didn't want to wait on these because they were disintegrating! Also, I was interested in trying something that was a little tougher than the basic rubber bushings. Jonathan | ||
| Steven R. Rochlin (Enjoythemusic)
Member Username: Enjoythemusic Post Number: 774 Registered: 4-2002 |
Verell and Jonathan, CONGRATS!!! Looks great and indeed we are ALL lucky to have a great man like Verell around. Enjoy the Drive, Steven R. Rochlin | ||
| Ernie (Ernie)
Member Username: Ernie Post Number: 810 Registered: 11-2001 |
Sweet job guys. This is great stuff. $23 bucks you can't be that. Buy the way how much were they asking for the "factory" crap. 'greasing the stud' Hahaha, thats funny stuff. | ||
| Henry D. Chin (Hanknum)
Junior Member Username: Hanknum Post Number: 221 Registered: 2-2002 |
Very nice job guys. | ||
| Jonathan (Birdman)
Junior Member Username: Birdman Post Number: 162 Registered: 6-2003 |
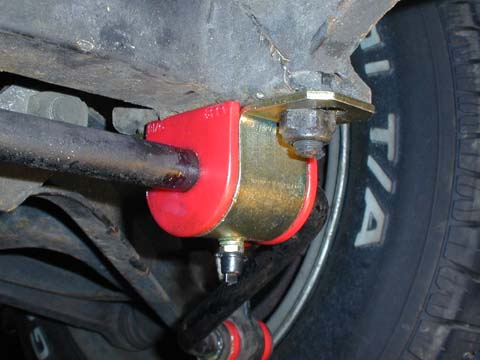 This is the installed new bushing on the sway bar. You get two in a set. The red polyurethane part pops out of the metal bracket and has a little slit in it so you can get it around the sway bar. I bought the greasable type which has a grease fitting. When you assemble, you put some grease in there. Then the fitting lets you add grease (either now or later) to be sure it won't squeak. I'm told that in general the non-greasable types don't squeak either as long as they are properly greased when assembled, though I suppose a few years down the line they could start squeaking. I figured what the hell, the one with the grease fitting is only about 50 cents more. FYI, you can get these in black polyurethane if you don't want to go for a custom look. My car is red, so I thought maybe red bushings would be cool. 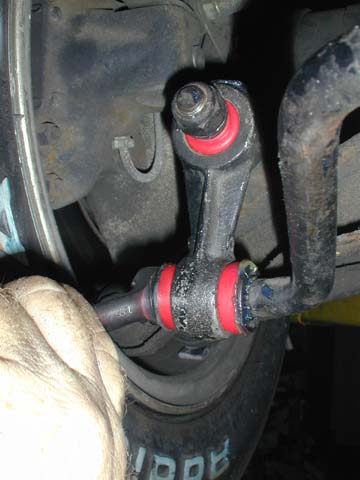 Now you just tighten up the new end links. The bolts bear down on the grommits so the bushings themselves are not getting squished by the nut too much. 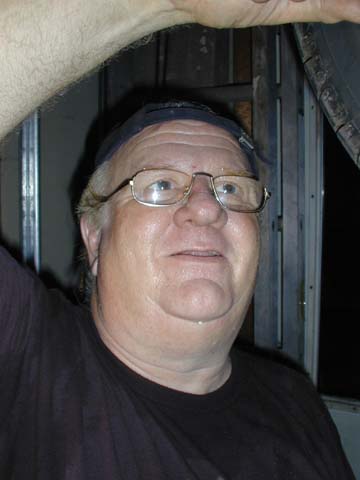 Finally, a shot of the master at work....Verell himself. I like the backwards baseball cap look! (Note from Verell...baseball cap is a good way to avoid getting grease or oil in your hair if the car drips on you or if you accidentally hit the top of your head on something greasy under the car.) I hope this has been helpful to anyone that might be considering doing this job. It took us exactly 2 hours to do it and I found it a lot of fun and educational. Next summer maybe I'll do the front one! By the way, I tested it out on the way home and it is much better. Lets just say that I had a little fun on a couple of twisty off ramps and the car felt a lot better with a functioning anti-sway bar! Best, Jonathan | ||
| Jonathan (Birdman)
Junior Member Username: Birdman Post Number: 161 Registered: 6-2003 |
Part 2 (I can only post 4 pics per message...) 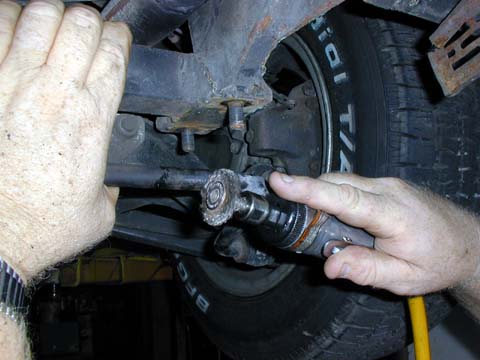 I forgot to mention that when we took the sway bar off, there was some rust under one of the old bushings, so we cleaned it up a little with a wire brush. Of course we used the opportunity to play with air tools, but an air powered brush is not necessary! 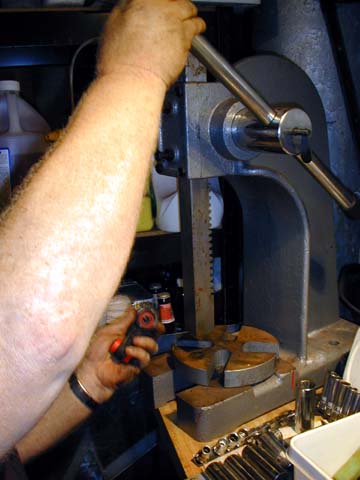 This is the press, a tool that makes this job a hell of a lot easier! 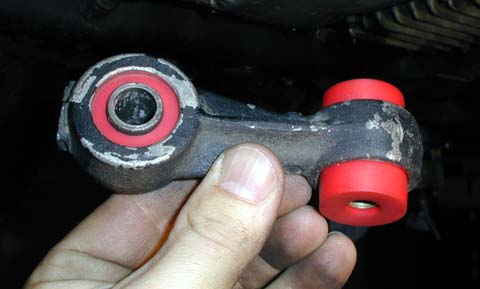 Here is the completed end link. One end has two bushings with a grommit in the middle and the other end link has a single bushing with a grommit. Please note that while one bushing had to have it's hold made a little larger, the outside diameter on them was fine. They are standard 1" end link bushings. Yeah, I know we should have sent this out to be powder coated before reinstalling but I had to get home! 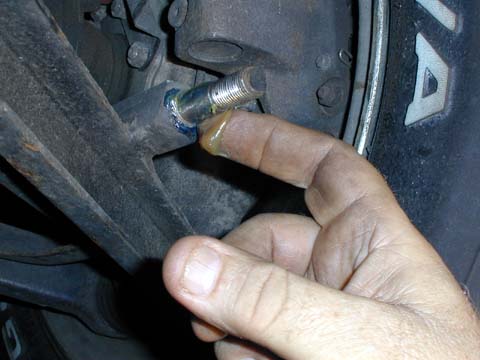 Greasing the stud before reinstalling the end link bushing on the car. Greasing the stud. That has a good sound to it. | ||
| Jonathan (Birdman)
Junior Member Username: Birdman Post Number: 160 Registered: 6-2003 |
Hi Everyone, Verell and I replaced the bushings on my 308's rear sway bar tonight. It sure is nice to have a friend like Verell close by! We thought it might be fun to take a few pictures in case anyone else was thinking of doing this. Basically, the rubber on my sway bar bushings was really really bad, almost falling off of the end links. I decided to attempt using polyurethane bushings rather than stock ones, hoping they will hold up better. More importantly, all the bushings together were $23.00 which is a lot cheaper than original Ferrari bushings. I started by getting under the car with a caliper and measuring the sway bar. Since the Energy Suspension (ES) bushings are built in english units, I measured the sway bar in english units and came up with a diameter of 9/16". Pleae note that this is different on different models and even between the front and back sway bar, so do not use my measurements...definitely measure your own sway bar before ordering. I went to ES's website (http://www.energysuspension.com) and found that I needed the 9.5153 sway bar bushings and 9.8106 end link bushings. The end link bushings really don't come in that many sizes, so some machining is required to make them fit. I couldn't find anyone locally that had the Energy Suspension bushings I needed in stock. So I called the company and asked who their biggest retailer was. Turned out to be summit racing. I called them and had the parts sent 2 day shipping so I had them for tonight's installation. The work began with putting the car up on Verell's lift. This one step is what makes working on the car so enjoyable. Without a lift, you will need to jack up the entire back of the car to get under there. Next we removed the sway bar entirely. This is pretty self-explanitory. It's 8 bolts and it's off. 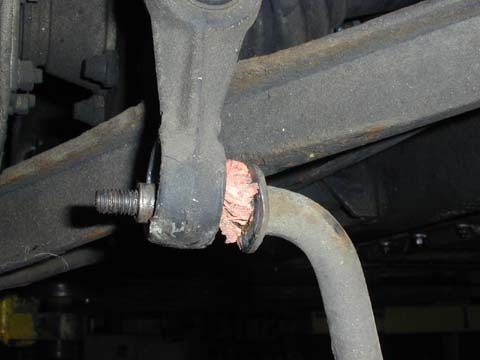 This is what the old bushing looked like once we got the nut off the end of the sway bar. Basically the rubber just fell out. Do doubt, this thing was toast. 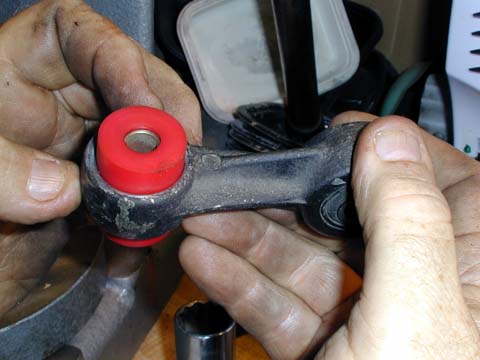 We had to salvage the little metal tube that was inside the old rubber bushing. For lack of a better word, I'll call it a grommit. We pressed two end bushings onto the grommit and then pressed those into the end link. The grommit was almost exactly the length of two bushings. The bushings come in packs of 8, but you actually only need 6. 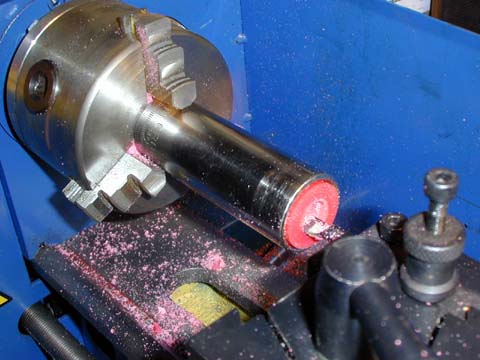 Here Verell is machining the hole in the middle of the bushing for the other end of the end link. This one has a larger diameter grommit. You could just as well use a drill to do this, but Verell likes an excuse to fire up his lathe. Note the clever use of a socket to hold the bushing without causing it to go out of round in the three teeth of the chuck. 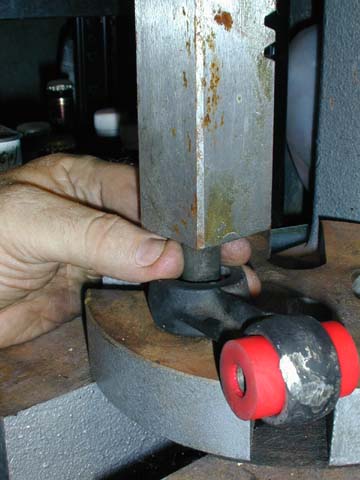 Here we are using the press to press out the old bushing on the other end of the end link. This one is a rubber bushing within two grommits. The outer grommit is in there tightly and takes a press to get out. |