| Author | Message | ||
| Andreas Forrer (Tifosi12)
Intermediate Member Username: Tifosi12 Post Number: 1797 Registered: 10-2002 |
The GT1 project like everything else (even my sims) is currently on the back burner. Working to meet a movie deadline (another hobby/project), so have to postpone. Also had to order some more 1/18 cars to cannibalize for the GT1. Will resume in the wintertime, helas. | ||
| Byron (Bmyth)
Intermediate Member Username: Bmyth Post Number: 1095 Registered: 10-2002 |
I've had the pleasure to see this model (and many others in Andreas' collection) in person and it is great! Andreas, you certainly have quite the knack for building scale size models... How's the GT1 project coming along? | ||
| Andreas Forrer (Tifosi12)
Intermediate Member Username: Tifosi12 Post Number: 1793 Registered: 10-2002 |
Hehe, Mitch you got me. Yes you're absolutely right. Two reasons for why I did this: The wing is actually from a 355 C car and hence smaller. Second it is really hard to glue a plastic part onto a polished metal part, whereas it is a lot easier glueing it onto the plastic window. | ||
| Mitch Alsup (Mitch_alsup)
Member Username: Mitch_alsup Post Number: 944 Registered: 4-2002 |
If you look closely, the real challenge car has the wing mounted at the very rear of the deck, while the model has the wing mounted on the glass above the engine. | ||
| Andreas Forrer (Tifosi12)
Intermediate Member Username: Tifosi12 Post Number: 1252 Registered: 10-2002 |
Thanks, but no thanks. Nice model, but I'll stick with the HW 360 Challenge. However if I had to do this project all over, I would actually start out with this yellow Challenge car as it has already a lot of things in place. You have to do some paint job anyway, so it would actually be easier and better looking to use your own red paint to make the changes. | ||
| Cavallino Models (Cavallinomodels)
New member Username: Cavallinomodels Post Number: 9 Registered: 2-2003 |
Andreas, great job. Here is a picture of the 3rd model that you need for your set. www.cavallinomodels.com  | ||
| Andreas Forrer (Tifosi12)
Intermediate Member Username: Tifosi12 Post Number: 1249 Registered: 10-2002 |
Thanks everybody for the kind words. This was truly a labor of love. | ||
| Scott85 (Scott85)
Junior Member Username: Scott85 Post Number: 87 Registered: 12-2000 |
That looks sweet ! Great job! | ||
| Paul Bianco (Paulie_b)
Member Username: Paulie_b Post Number: 312 Registered: 1-2003 |
Real nice. You have a great talent. | ||
| DES (Sickspeed)
Advanced Member Username: Sickspeed Post Number: 4566 Registered: 8-2002 |
Andreas, that's awesome...! Very, very awesome... | ||
| Andreas Forrer (Tifosi12)
Intermediate Member Username: Tifosi12 Post Number: 1247 Registered: 10-2002 |
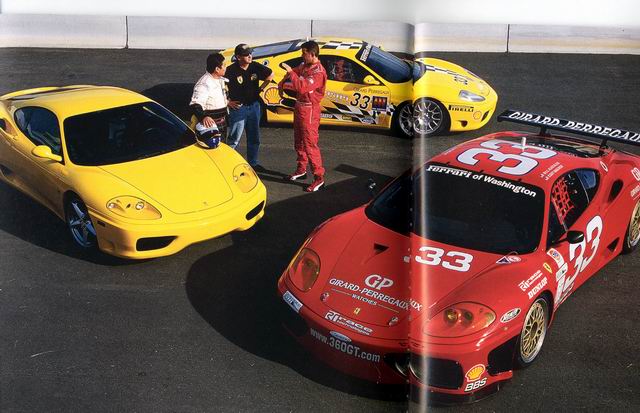 This is a picture taken from the last Rosso magazine.  Here the 'reinactment' in 1/18 scale.   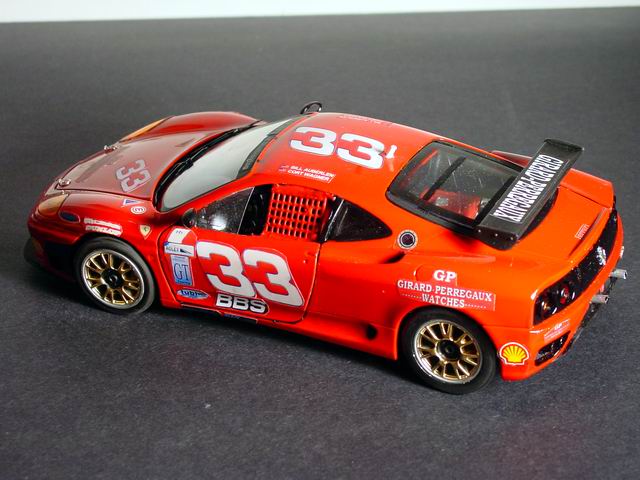 I started out with a Bburago 1/18 "Challenge" car, which (in bad Bburago tradition) was a standard street car with stickers. So first order of biz is to remove all existing stickers (except the Electrical switch sticker and the fuel tank ones, those need some paint to make them look right). Then I got some donor cars (hey, nobody said kitbashing was cheap!): - A HW 355 Challenge car for the rear wing (although still too small). - A 288 GTO for the hooks on the front trunk. - A HW 360 Challenge car for the slick tires, wheels, roll cage and seat - A NASCAR kit for the safety net on the driver's side Since the 360 model uses also glue to keep it together (not just screws), I didn't want to take it apart for painting but rather painted the interior in matt black through the open doors. Once done you can put in the race seat, then the roll cage. Finally you add the triangular windows and the net. The engine cover has also been replaced by the 360 Challenge one and repainted. Engine itself got modified and partly painted as well. The mods for the brakes and cooling in the front were not really cut as in the original, but just painted over. Also the rear got just painted and not remodelled. However I did close the frontal opening for the air and added the flat underbody at the front. Also the wheels need a new paint job, along with the brake calipers. Holes were drilled for the antenna and the new exhaust pipes. Kitbash parts added and painted. Finally I put together a set of stickers for all the decals. I scanned them off the pictures in Rosso. That affected the quality negatively, but is the best I could do for the time being until I 'meet' the real car in person. Another issue I had to deal with was the shine through on the stickers, so I had to come up with a two layered approach. That makes the stickers thicker unfortunately as you can see on close-up. But such is life. Next project in the pipeline: 360 Stradale... |