| Author | Message | ||
| Tom Bakowsky (Tbakowsky)
Junior Member Username: Tbakowsky Post Number: 150 Registered: 9-2002 |
Thanks alot for the step by step. I'll be attempting this project very shortly. I hate that cream fabric garbage. It's gotta go!! | ||
| Jerry W. (Tork1966)
Member Username: Tork1966 Post Number: 349 Registered: 7-2001 |
Thanks Tom & Jeff. Here is an exerpt from a prior posting when I first started the project: I have received many inquiries about my weekend "rear shelf removal" so I am going to post the exact procedure here. The whole removal process took about 2.5 - 3 hrs. Screw locations for heat shield are as follows: (3) 10 mm nuts protruding into the engine bay facing rearward. They are located at each end of the shelf (about 2" from each outer edge) and one in the center. You will need a deep dish 10 mm socket because the studs are long. You will be able to spot the bolt location by the hose clamps that are also held in place by these bolts. You will have to pull down on the braided hose (that will be in the way of getting to the nuts) with one hand while turning your ratchet with the other. You will not need to remove the hood or the air cleaner to do this, it is not that hard. Once you have the 3 nuts off, then simply pull the heat shield down and out of the way. This will expose the (2) 10 mm nuts that hold the rear U shaped filler piece that is below the rear window. take these nuts off and you are done in the engine compartment until re-assembly. Note: my nuts were so rusty that they snapped off (that definitely didn't sound good did it?) and I had to drill out the old ones and re-cement new ones...no big deal. The next step is to take your 17 mm seat belt bolts out of the horizontal rear shelf. Very easy. You now need to push your side windows out. Just start pushing on the rear lower corner of the side window until the rubber gasket starts to come out of the slot that holds it in. DON'T try to take the glass out independent of the rubber gasket, take it out as one piece! Just keep pushing, then let up, then push a little more, etc. until that gasket comes out of the slot, then it will come out like a baby out of the birth canal. You do not NEED to take your side louvers off, I didn't. The reason for the side window removal is to expose the rivets that hold the rear horizontal shelf, the very back small filler pieces and the upper U shaped cream colored piece. The rear horizontal shelf, the filler pieces and the upper piece all have 2 rivets on each side that you will drill the heads off of. Again they will all be in the side window frames and exposed once the glass is out. You will also need to remove the (4) 3 mm alan bolts that hold the 2 black metal brackets in place (that the targa clamps to) on the upper U shaped trim piece. The pieces are now free to be pulled out. I also removed the 2 black pieces that run along the back side of each seat (from the floor to the shelf) and the 12" cream colored pieces above them. Take the 12" cream colored pieces out first as they are held in place only by clips. Just wiggle and pull on them. That will expose a rivit in the top of each of the longer black pieces that must be drilled. U R done. Jerry | ||
| Jeff Edison (Euro308guy)
Junior Member Username: Euro308guy Post Number: 152 Registered: 7-2002 |
Nice work, Jerry. | ||
| Tom Bakowsky (Tbakowsky)
Junior Member Username: Tbakowsky Post Number: 148 Registered: 9-2002 |
Jerry...I tryed to send you an e-mail but it would not go through...Anyway...How'd you remove the side glass? Does it just push out? I have never had to remove this glass before and want to make sure that I'm on the right track. You car looks very nice..and that rearshelf treatment is awsome. I'm going to copy you and do the samr thing to my car. I hope thats o.k. | ||
| Jerry W. (Tork1966)
Member Username: Tork1966 Post Number: 347 Registered: 7-2001 |
Here are a couple of pics of the end result of my disassembly of my rear shelf and all ancillary pieces and their recovery and re-assembly. I'm sorry but I didn't take and "before" pics, but trust me all of the vinyl covered pieces behind the seats looked very weathered. Jerry 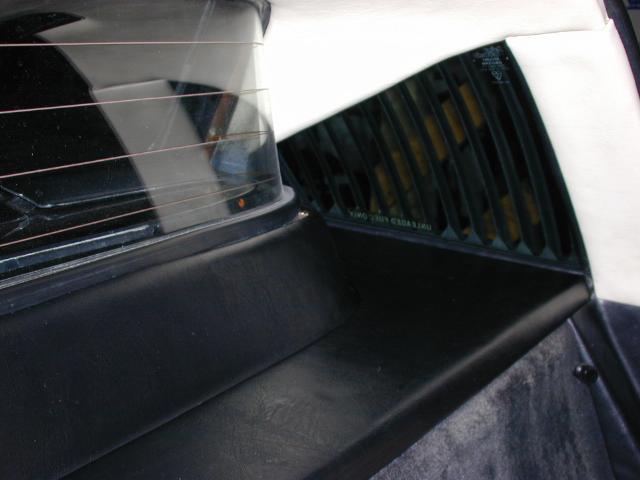 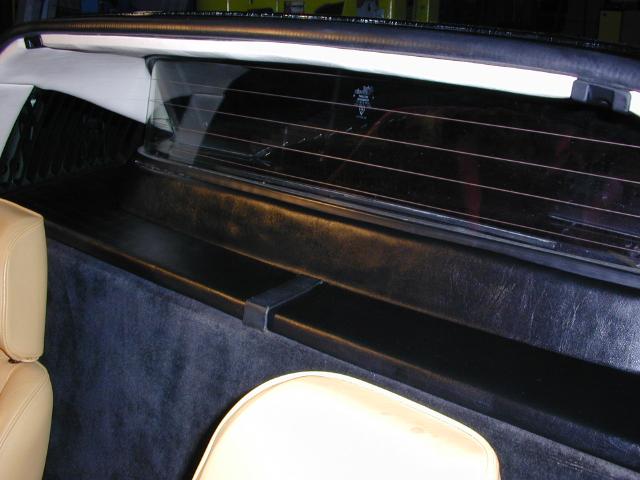 |