|
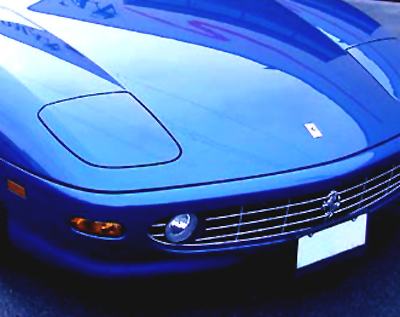
"If you drive your car on the road or park it outside, you will
have contaminants on your car... Once you’ve identified that your
paint has contaminants (which almost all cars do), the next step
is to remove them."
This month we discuss the
subject of detailing clay bars and removing contaminants from your
vehicle’s paint and glass. Although clay has been used for years
for industrial and commercial applications, it has recently
emerged as the go to consumer detailing product for preparing your
vehicle’s surface prior to compounding, polishing and waxing. It’s
like giving your paint a full exfoliation prior to moisturizing
but selection of the right clay, using the right techniques and
knowing when to use clay is critical because like all good things,
improper use can mar/scratch your paint and create more work; but
once you’ve learned the “how to” you’ll wonder why it took so long
to discover it (kinda like trying sushi).
 WHAT
IS DETAILING CLAY? WHAT
IS DETAILING CLAY?
Detailing clay is an elastic and malleable synthetic material that
is used in combination with a specifically made surface lubricant
and is usually the best way to remove paint overspray, tree sap
build up, bugs, brake dust, industrial contamination/fallout and
other hard to remove surface contaminants. Clay has been used
since the early 1900’s in body shops for overspray removal but has
recently been refined and marketed to car enthusiasts for removing
surface contaminants prior to polishing or applying a protective
layer of wax. Clays will smooth the surface of paint by pulling
contaminants out of the pores of the paint (yes your paint is
porous like your car’s glass) or sheering off the minute high
spots of your paint depending on the aggressiveness of the clay.
That said, the contaminant removal can be done safely and easily
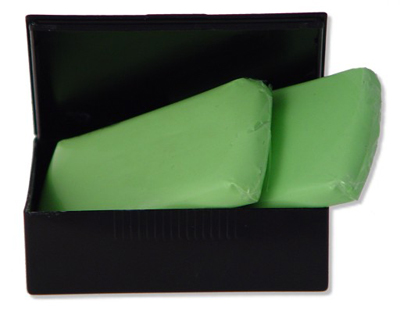
once you’ve learned the proper techniques. The detailing clay bars
come in different sizes from 3 to 8 ounces, colors, abrasive
grades and elastic stiffness.
WHEN DO
YOU USE IT?
To properly detail the exterior of your vehicle, prior to adding
that final protective layer of wax or paint sealant on your paint,
the surface should be free of any contaminants. Otherwise, you
will be sealing the contaminants under the layer(s) of wax or
paint sealant that you apply thus affecting the optical clarity of
your paint and also decreasing the “wet look” or distinction of
image (DOI). Worst case is that the contaminants continue to
deteriorate your paint (as is usually the case with industrial
fallout or rail dust).
 The
first step is to properly wash and dry your car, which prepares
the surface for claying and also cools it. Read our article on
“Washing Your Car” for the proper techniques and tips. Once you’ve
washed and dried your car, then you can gently run your fingertips
over the paint surface to feel the imperfections and also
contaminants. If the surface feels smooth, you now should take a
piece of cellophane (plastic cigarette wrapper or substitute with
a plastic vegetable bag) between your fingertips and the surface
to feel the same areas. The cellophane is like a magnifying glass
for your sense of touch and you will now be able to feel all the
imperfections and contaminants on your paint surface. If you drive
your car on the road or park it outside, you will have
contaminants on your car especially on the hood, trunk lid, rear
bumper and undersides behind the wheels. So once you’ve identified
that your paint has contaminants (which almost all cars do), the
next step is to remove them. The
first step is to properly wash and dry your car, which prepares
the surface for claying and also cools it. Read our article on
“Washing Your Car” for the proper techniques and tips. Once you’ve
washed and dried your car, then you can gently run your fingertips
over the paint surface to feel the imperfections and also
contaminants. If the surface feels smooth, you now should take a
piece of cellophane (plastic cigarette wrapper or substitute with
a plastic vegetable bag) between your fingertips and the surface
to feel the same areas. The cellophane is like a magnifying glass
for your sense of touch and you will now be able to feel all the
imperfections and contaminants on your paint surface. If you drive
your car on the road or park it outside, you will have
contaminants on your car especially on the hood, trunk lid, rear
bumper and undersides behind the wheels. So once you’ve identified
that your paint has contaminants (which almost all cars do), the
next step is to remove them.
HOW DO YOU
USE IT?
There are two techniques to use with similar results but will
depend on your preference. You always want to work in the shade
and on a cool surface.
• Unwrap your clay bar and if it came in an 8 ounce size, cut it
in half and store half in the original wrapper, Saran wrap or
carton.
• Knead the piece you will use to soften it up and also to form a
fit to the palm and fingers of your hand (you can also soak it in
warm water to speed the softening process).
• Visually inspect the clay surface to make sure there is nothing
on it (if you drop the clay, absolutely throw it away and use a
new piece since it will act like sand paper and scratch- don’t be
frugal on this one since it will create more work when you have to
remove scratches).
• Start with the hood, then roof, rear deck lid, rear bumpers,
etc… (just like washing your car).
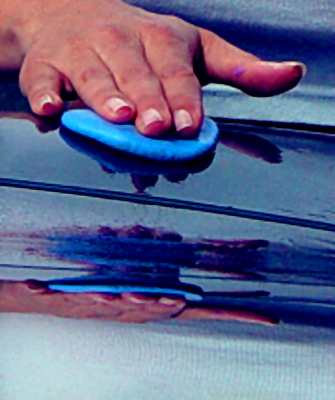
1.
CLAYING WITH A
LUBRICANT:
A. Spray the lubricant mist on a 12”
x 12” square.
B. With the clay cupped in your finger tips and palm, place
the clay on the surface and with little pressure, glide it in a
straight back and forth motion (front of car to back) finishing
the 12” x 12” square.
(NOTE: only use one side of the clay and always keep one side
clean which you will fold to create two clean and virgin sides)
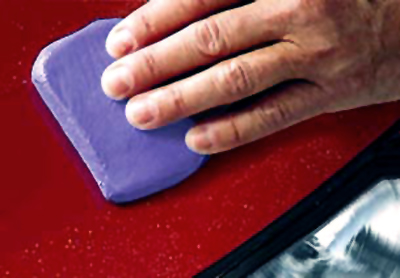
C. Inspect the clay surface frequently to make sure there
isn’t anything stuck to it that could create a scratch. Once the
clay surface is dirty and somewhat saturated with the
contaminants, fold the clay to expose the virgin clay.
(Theoretically you can keep folding repeatedly to expose clean,
virgin clay but reality is that the clay will become saturated and
will need replacing eventually.)
D. You will feel the paint surface getting smoother and the
friction reducing which indicates the contaminants are being
removed (you’ll also see the lubricant color change as the
contaminants are now floating in the lubricant as well as the clay
getting dirtier).
E. Once done with the 12” x 12” square, repeat for the next
12” x12” square until you are done with the entire car.
F. When finished, again fold the clay and spray with the
lubricant and store in the original wrapper, Saran wrap or carton.
G. NOTE: if you feel high friction or pieces of clay are
sticking to the paint, you are not using enough lubricant or the
surface is too hot.
2.
CLAYING DURING
YOUR CAR WASH:
A. After washing and rinsing your
car, glide the wash mitt soaked with soap water over a 12” x 12”
square. You will now use the soap water as the lubricant.
B. Follow steps b through g in “Claying with a lubricant”.
C. After claying is complete, wash the car again and dry.
 FOR
SEVERE OVERSPRAY FOR
SEVERE OVERSPRAY
There are instances when you have to remove severe overspray or
contaminants on your paint surfaces where the prior two techniques
were not effective. The solution is to increase the friction
between the clay and the paint surface for a more aggressive
cleaning. You now will use water in place of the prior mentioned
lubricants but this technique will promote and introduce scratches
to your paint while you are removing the stubborn overspray and
contaminants so you will need to follow with a compound or polish.
Although it will create more work to remove the scratches left
behind by the clay, it is the lesser of the two evils since the
only other alternative is to wet-sand which creates much more work
and should only be attempted by those experienced with that
technique.
FINAL
COMMENTS
As noted earlier, to prepare the paint surface in your detailing
process and paint re-conditioning, you should wash your car and
then claying should be the next step prior to the complete detail
(compound, polish, wax/sealant). Depending on the grade of clay
you use in your claying process, it will remove your wax and paint
sealant and the contaminants that are stuck to the clay will
create very minute and fine scratches that are more noticeable on
darker cars. You have to look very closely to see them but they
are there.
Remember, clay will remove paint overspray, tree sap build up,
bugs, brake dust, industrial fallout, light oxidation and other
hard to remove surface contaminants but it is not a polish and
will not remove scratches. So now that you have purified and
prepared your paint, you are now ready to follow with the paint
re-conditioning.
If you have any questions or comments, please feel free to contact
me at 1-866-DET-DyNA (866/338-3962) or email us at
[email protected]. May the
wind be always at your back and may you achieve your pursuit of
detailing perfection!
 |
|

